Echo360 Best Practices and Guidelines
Echo360 is the lecture-capture system that is used by the College of Medicine. We use it to create placeholders for upcoming live activities (e.g., lectures, core cases, flipped classroom) and to upload previously created video tutorial content, typically created by faculty to be used by students as prep work for an active learning session. Coordinators at each campus typically work in concert with their educational technology / classroom technology experts to ensure sessions in classrooms and auditoria are recorded properly. Students are informed that it could take up to 48 hours for a recording to show up in Echo360, however, 99.9% of the time it's within a couple hours. It can depend what time of day the live session to be recorded took place as the college of medicine is not the only user of this service.
It is used much more regularly in Phase 1 than in Phase 2.
Organizing Content in Echo360 Heading link
Phase 1
Depending on the campus, either information resources or the project managers set up the structure of Echo360 for each block course in each academic year. An example of the naming structure for each block course:
Block 1 – [Campus] – F22 Body Systems and Homeostasis I
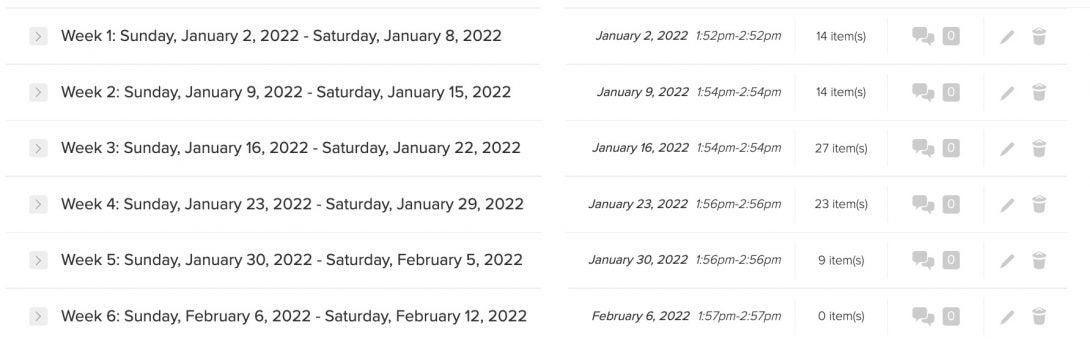
For each block course in Phase 1 such as the one named above, project managers or local coordinators add a class group (similar to a folder) for each week of instruction. It is a best practice to include the dates of each week within the class group like in the image.
A class group is similar to a folder and within it are each class recording from that week. It’s helpful to add dates to the class group as well as class recordings as doing this will help keep them in date-arranged order.
Placeholders Heading link
Within each weekly class group (folder), local coordinators (or project managers) create ‘placeholders’ for each activity for the week. Some of these placeholders are for upcoming live activities and others are for pre-recorded content created by faculty. These placeholders generally include the name of the activity. There are different procedures for publishing content from one class year to another vs setting up a schedule for future recordings. Work with your campus project manager to better understand this process.
Phase 2
For Phase 2, a similar structure is set up though each class group is just the name of the clerkship. As there are not remotely as many recordings to deal with in Phase 2, this structure works well.
Creating a Link to Echo360 Sections for Phase 1 and 2 Heading link
While there is an LTI (learning tools interoperability) connection within Blackboard to connect Echo360 with it, we have migrated to creating access links instead. We have had some difficulties with the LTI format – the connection seems to break more often than we’d like.
Project managers or local coordinators can create an access link. In fact, anyone with the role of instructor in Echo360 can do it. However, in general, leave it to the project managers to do this. Go to the course / section. Click on Settings > Access Links > Add Link. Create a private link. Copy the URL and you can now link to it in Blackboard.
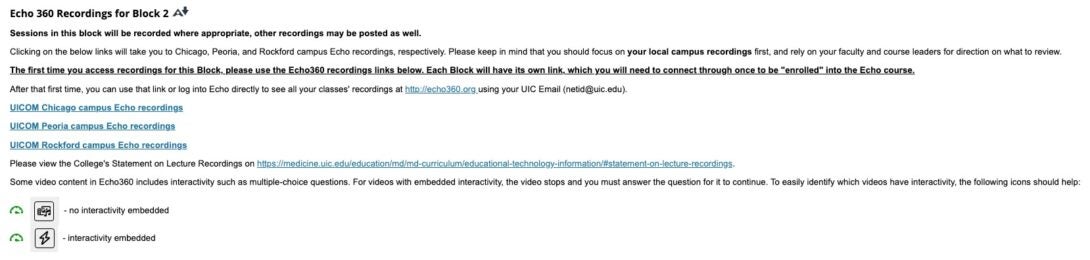
The screenshot shows how we add this information to Blackboard in Phase 1 for students to access recordings. The wording included in the screenshot is subject to change.
Note: this process will automatically enroll everyone who clicks on the link in Blackboard as a ‘student’ in Echo360. The former process of using the LTI connection could distinguish if a person had an instructor role in Blackboard and add them as an instructor to Echo360; this process cannot distinguish roles. If a faculty member clicks on the link and it adds them to the Echo360 section as a student, we can correct this so they are included as an instructor. In the end, for most faculty members, the differing roles in Echo360 really doesn’t matter so much.